Create your provider
Your provider is your branded workspace on Komashi. You describe your business, and Komashi creates the provider and your first service in one go.
Start
After you sign in for the first time, Komashi asks How do you want to get started? Choose Become a provider.
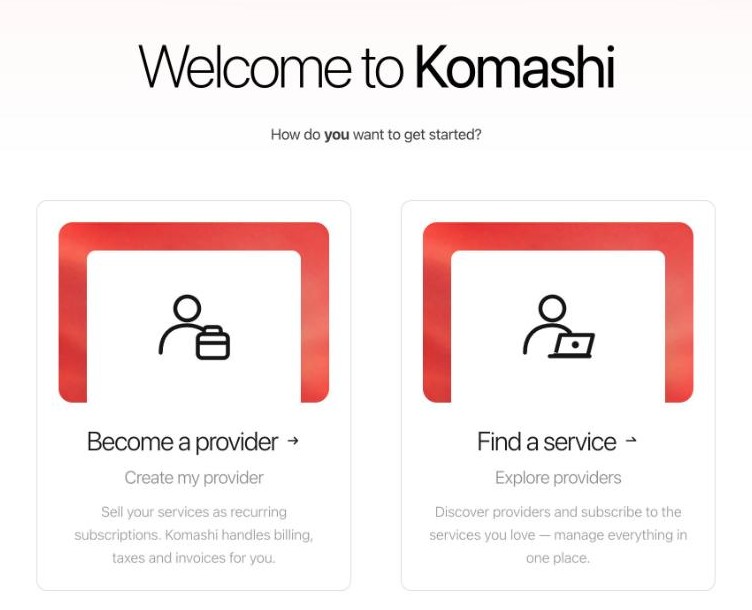
You can also start from the Komashi homepage: type the subdomain you want into the yourbrand.komashi.com field and press Enter. This opens the same setup.
If you already have a provider, use the provider switcher in the top-left of the Control Center and choose Create new provider.
:::note Looking for a service instead? Find a service opens the provider search. Enter a provider's subdomain to see their services. See Who is an end user? :::
Step 1 · Describe your business
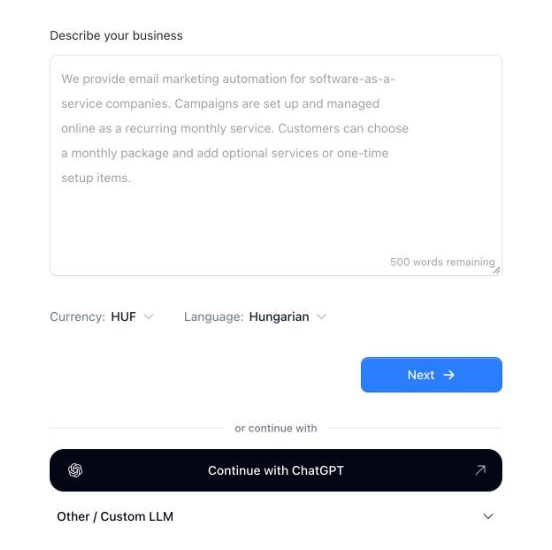
- In Describe your business, write what you sell, who it is for, and how customers pay. You have up to 500 words.
- Check Currency and Language:
- Currency becomes your catalog currency. You cannot change it later in the Control Center, so pick the one you will price in.
- Language is the language Komashi generates your service and storefront in.
- Click Next.
The more concrete the description, the better the result. Komashi uses it to suggest the VAT type on step 3 and to write your first service.
Or use an AI assistant
Under or continue with you can hand the setup to an AI assistant instead of filling in the form:
- Continue with ChatGPT opens ChatGPT with a ready-made request to use the Komashi provider creation tool.
- Other / Custom LLM gives you a prompt to copy into any AI assistant. It points the assistant to the Komashi MCP endpoint (
https://mcp.komashi.com, OAuth 2.1). See MCP Endpoint.
Step 2 · Name and subdomain
- Enter your Business name.
- Enter a Subdomain. Your storefront will live at
yoursubdomain.komashi.com. If you leave it empty and click Next, Komashi suggests one from the business name. - Optionally click Upload logo. You can also add or generate a logo later in Basic Settings.
- Click Next.
:::caution Restricted words Some words are not allowed in provider names, for example Test. If you see This subdomain contains a restricted word, check the Business name as well as the subdomain — the message can refer to either. :::
Step 3 · Summary
Check what Komashi will create, then click Create provider.
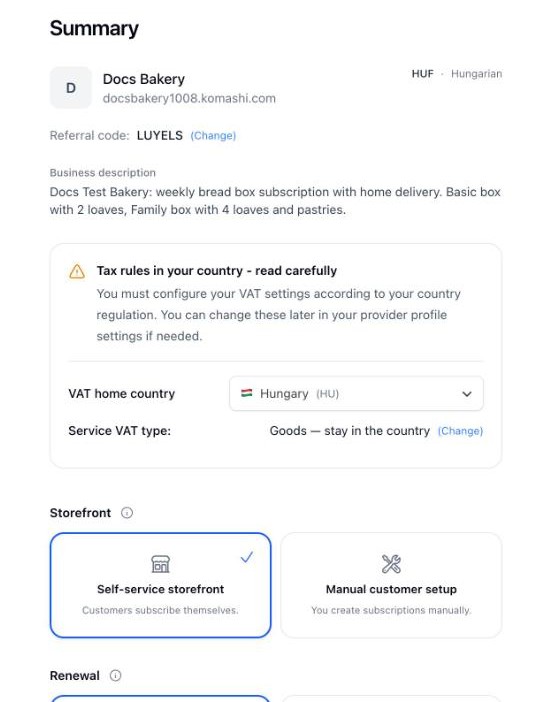
Referral code. If a partner referred you, click (Change) next to Referral code, enter their code, and click Validate. A valid code shows Discount applied — the referral code is used. Enter it here: this is what links your provider to the partner. See the Partner Program.
Tax rules in your country. Set your VAT home country. The Service VAT type is suggested from your description — click (Change) if it is wrong. The six types are described in Manage Services.
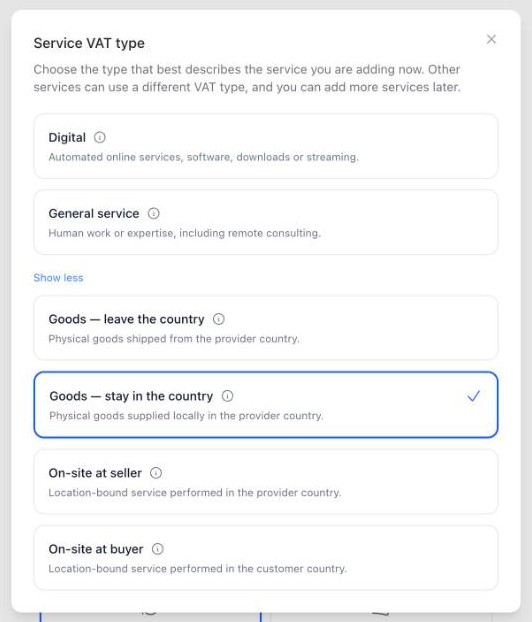
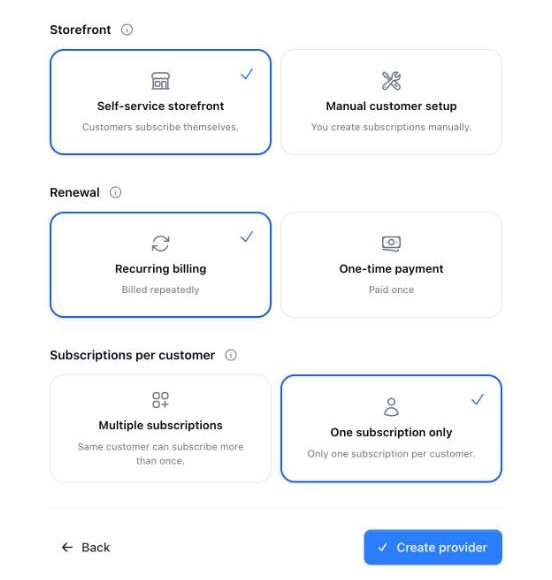
Your first service. Three choices decide how the service works:
| Setting | Options | When to use which |
|---|---|---|
| Storefront | Self-service storefront (default) · Manual customer setup | Self-service: customers choose a plan and subscribe themselves, for example an online course. Manual: you create the subscription yourself, for example after a one-to-one consultation. |
| Renewal | Recurring billing (default) · One-time payment | Recurring for a monthly membership or software subscription. One-time for a single consultation or a workshop ticket. |
| Subscriptions per customer | Multiple subscriptions · One subscription only (default) | Multiple if a customer can subscribe to several plans. One only when each customer should have a single active subscription, such as a membership. |
What happens next
Komashi creates the provider and opens Services in the Control Center. Your first service is generated in the background — it takes a few seconds — and Create your first service in the Setup guide is ticked automatically.
:::danger Your first service is live immediately The generated service is published with starter prices that do not come from your description. Review it before you share your storefront. See Create your first service. :::